

Sometimes staring at a newly created, richly textured, colorful mixed media background can be as bad as a blank page. The background looks great, but now what? To spark your creativity, try the following 5 mixed media art ideas on any background.
A Mixed Media Background
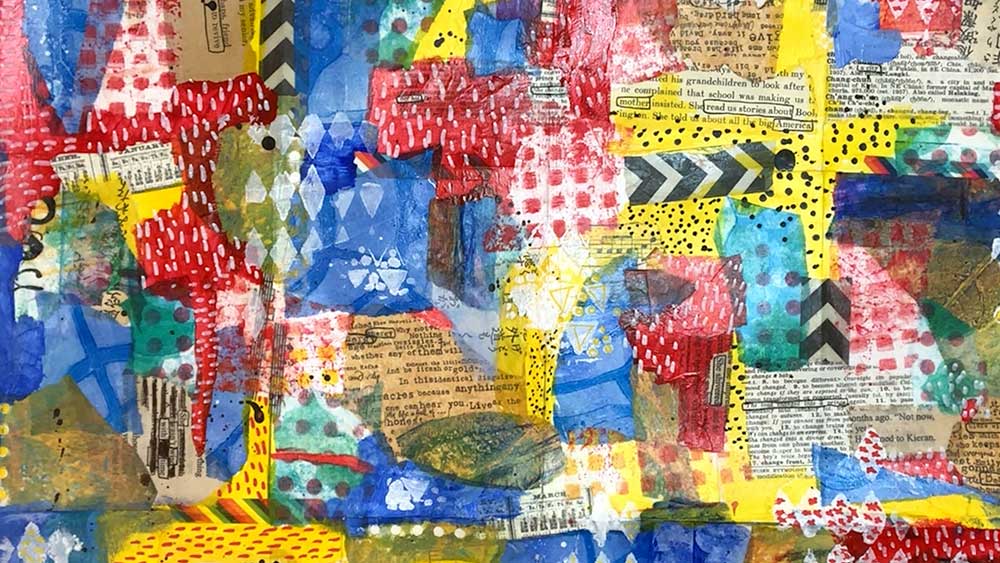
A few weeks ago, I created one large mixed media background and then cut it up into 10 pieces to make cards for #the100dayproject. (This year, I’m creating #100lateholidaycards. You can read about it here.)
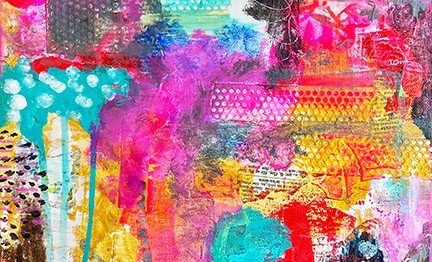
The process was relatively easy to create the background: collage washi tape in various places, collage painted papers and book text intuitively, add some paint colors to connect the various collage pieces, then finish it with some stenciling and mark making. At the end of the session, the background looked like this:

Crop & Frame It
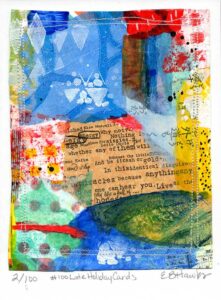 Sometimes the background you created is a gorgeous abstract piece of art on its own. You might want to simply crop it and enjoy it. Cropping is about trimming away everything from your artwork until only the essential remains. Cropping a piece can change it completely taking it from “just okay” to “Wow!”
Among other benefits, cropping your art can:
- Remove a boring or muddy part of the art
- Change the focal point
- Give the art some clarity / make it less busy
- Realign your work compositionally to something more pleasing
Audition a few different crops before you cut into the original to make sure you choose the composition most pleasing to you. There are several ways to try out different crops.
- You can just use blank pieces of paper to block out parts of the background to determine where the best focal point might be.
- At an art store once, the framer had leftover mat board. She cut it into 2 L shaped pieces and gave it to me for free to use as a viewfinder.
- One of the best ways is to digitize your work either by taking a picture of it or scanning it into the computer. Then, using your photo editing tool, crop it 4 different ways. Walk away from it, then come back later and take note of which composition your intuition tells you is strongest. Trust yourself.
Tip: This handy little artist toolset is awesome and includes a viewfinder. It’s really great if you sketch in plein air.

Block in a Shape
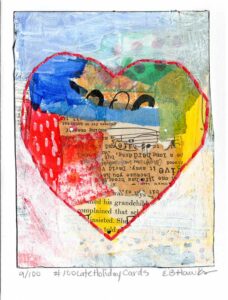 Creating negative and positive space in a background can garner tons of fun results. Positive space refers to the subject or areas of interest in an artwork, such as a person’s face or figure in a portrait, the objects in a still life painting, or the trees in a landscape painting. Negative space is the background or the area that surrounds the subject of the work.
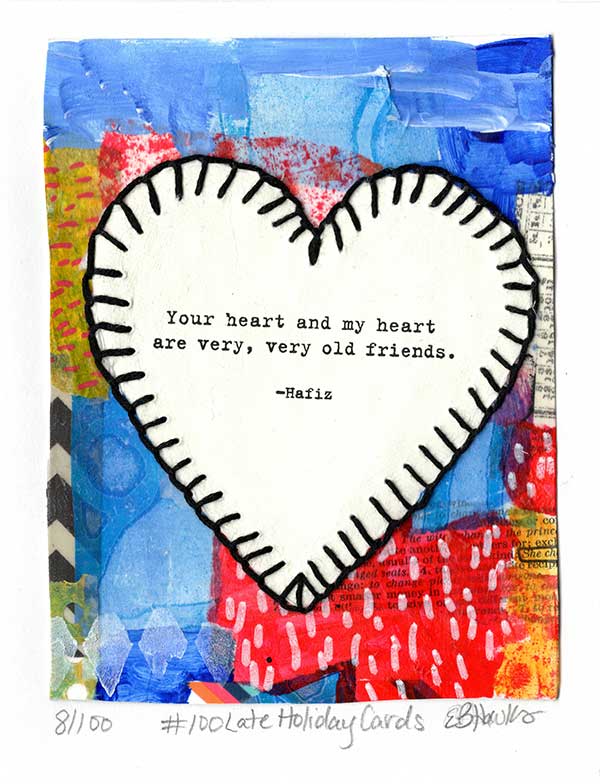
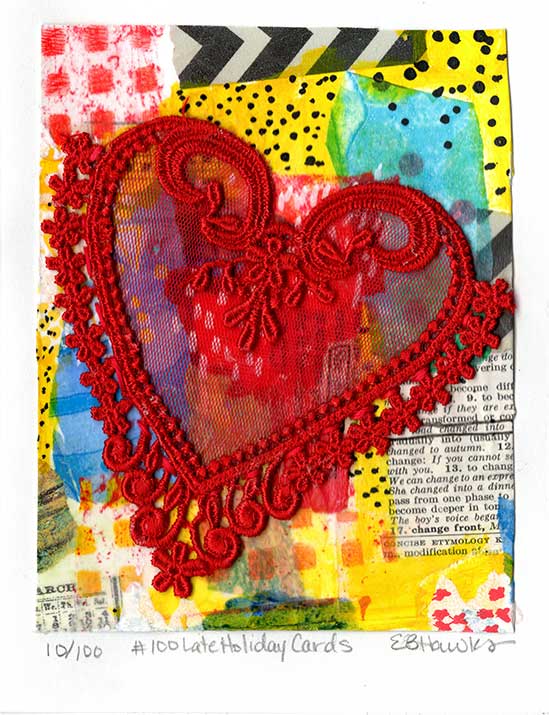
In this example, I drew a large heart and made it the positive space by applying gesso to the exterior of the shape (the negative space). The vibrant, layered background suddenly becomes a very interesting focal point.
This technique works great with figures, too. Check out this art journal page to see another example of blocking in the background to create positive and negative space.
Tip: I like Liquitex Basic Gesso for surface prep of art journal pages and backgrounds like this. It starts out pretty thin for a gesso and can be mixed with water to get a more translucent finish.

Add a Silhouette Focal Point
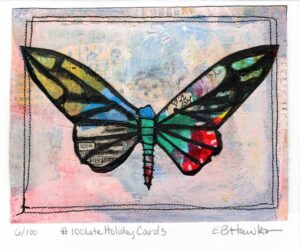
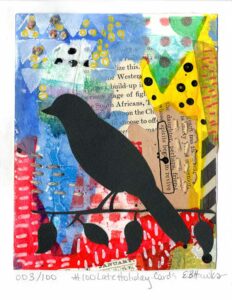 A super busy background can make it difficult to create a focal point with enough contrast to show up. If the background is generally colorful and not too dark, adding a silhouette can set the entire piece off such as in this bird card, this journal page, or this piece in my shop.
If the background is dark, however, you might need to lighten it before adding your silhouette. It can be adjusted afterwards, but it’s a lot easier if you lighten it up first. I speak from experience.
Tip: If you have a cutting machine like the Cricut or Silhouette, cutting out quotes or shapes in black vinyl works great, too. Then, it’s easy to transfer. I add a coat of Matte Medium over the top to keep it in place and Voila! It’s a great technique to make DIY signs and gifts.

Tint the Background
 Gesso, fluid acrylics, and watercolors are great to use when you want to help items in your art homogenize. Choose a color, water it down, and paint it over the entire background. The texture of the underlayers will still shine through, but instead of being busy and colorful, they will all meld together under the transparent, uniting wash of color. This technique is particularly helpful if you plan to add something colorful as a focal point that needs some contrast to stand out.
Tip: I like Liquitex Basic Gesso for surface prep of art journal pages and backgrounds like this. It starts out pretty thin for a gesso and can be mixed with water to get a more translucent finish. I particularly love to mix it with Golden Fluid Quinacridone Nickel AZO Gold Acrylic Paint — the color is gorgeous.

Collage & Assemblage
Collage
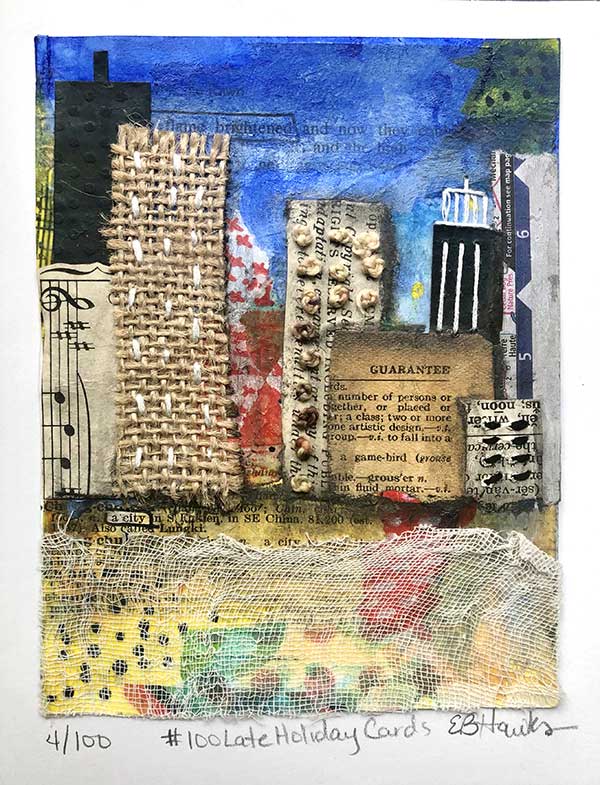
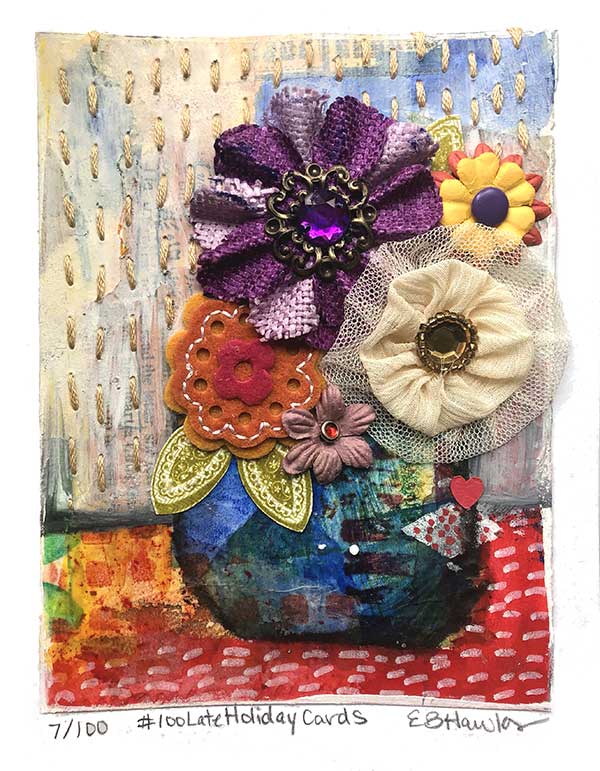
Lastly, you can collage a focal point onto a background. Collage is a whole artform in and of itself, but some quick ideas include:
- Cut papers into shapes to create a landscape (or cityscape).
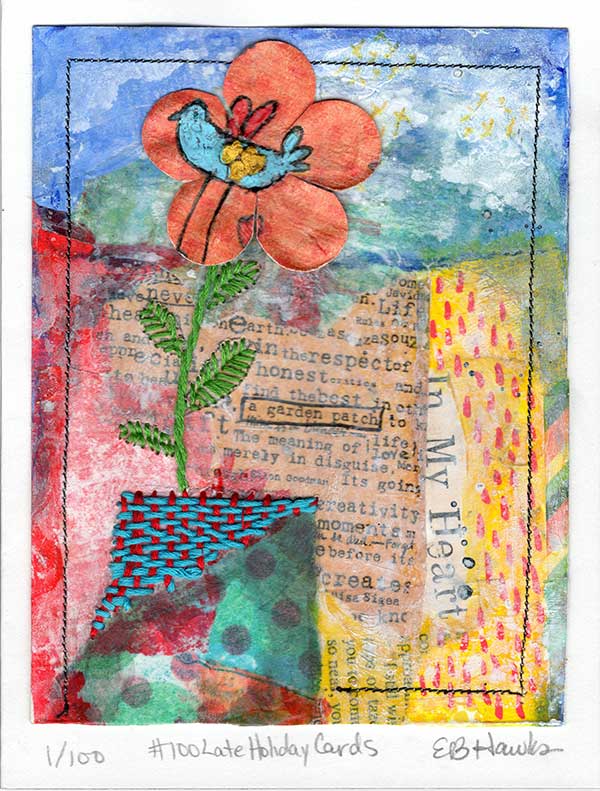
- Find a great quote. Cut it out and glue it down.
- Cut and assemble pieces of paper to create a cute animal.
- You can also try torn paper collage like this painted bunting bird.
Tip: My favorite collage adhesive is Liquitex Fluid Matte Medium for flat papers and Golden Matte Gel Medium for cardstock, fabric, or heavier flat items.

Assemblage
Another tip is to try assemblage. Whereas collage tends to be a two-dimensional medium, assemblage consists of three-dimensional elements projecting out of or from the substrate. It typically uses found objects, but is not limited to these materials. Try gluing down found objects around your house or using up some old scrapbook or craft supplies.
Tip: My favorite glue for assemblage is Helmar 450. It dries quick and holds everything down.
So there you have it: 5 mixed media art ideas for any mixed media background (+1 bonus if you count the assemblage 😉 Each of the cards was topped with some hand stitching and a personalized note and sent off in the world to their new owners.
Out of curiosity, which card do you like the best?


3 Comments. Leave new
Love this. I just opened an Etsy Art store so this is super handy. 🙂
I love the look of the mixed media, especially the bits of newsprint. Sheet music would be cool to use, as it feels romantic to me! I’ve always wanted to explore mixed media more, so thanks for the inspiration!!
These are so fun! This is something I have wanted to try but have never known where to start, these ideas are so helpful. I love the cityscape collage card.