

I love the summer. I love the sun and the warmth and the many hours spent outside. Living in the Pacific Northwest, I know the rainy days are going to come back soon, but for 2 months the weather is idyllic here. As I’ve been spending so much time outside, I began to really look around at the foliage and appreciate the unique shapes and textures. So, I did a little treasure hunt in my yard and collected a variety of leaves to experiment with on the Gelli plate.
Materials
— 8×10 Gelli Plate
— Golden Open Acrylic Paints
— A collection of leaves
— Optional: texture making tools such as stencils and stamps
Gelli Basics
There are some things to keep in mind when you play with Gelli printing that lead to more success.
Paint Recommendation
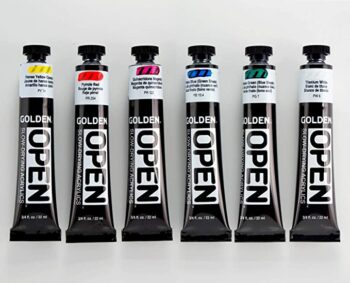 Generally when using the Gelli plate, you want to stick to acrylic paints. I like to use Golden Open Acrylics. Open acrylic paints stay wet far longer than other acrylic paints, so I don’t worry about the paint drying on the plate before pulling the print.
Don’t Use
Don’t use dyes on the Gelli plate such as rubber stamp dye inks, spray inks, or fabric dyes. They can permanently stain the plate.
Layering
Another basic rule for success is to work from light to dark when layering your prints. If you attempt to layer a light color atop a dark color, it often doesn’t show up well. When you layer a dark color over a light color, the high contrast works really well.
There are a few exceptions to that rule. Within the Golden Fluid Acrylic line, for example, the “Iridescent” or metallic colors are opaque and layer beautifully atop dark colors such as the: silver, bronze, copper, and gold. Also, if you have a great opaque white, it might layer successfully atop dark colors.
Papers
People often ask what type of paper to use for Gelli printing and collage. The answer is anything goes.
Patterned Papers
Starting with a piece of paper that already has text or patterns on it makes the print more richly layered. Some of my favorite printed papers to use include book text, old maps, sheet music, and scrapbook paper. The only caveat is to not use papers that are too old and fragile. They end up sticking to the plate and becoming a big mess.
Blank Papers
There are 3 types of paper that also work really well if you want to start with a blank slate: regular typing paper, deli paper, and rice paper. Typing paper is great as it’s cheap and readily available in mass quantity. Deli paper might be my overall preference because when you collage with it, it becomes transparent so it feels like it melts into the composition.
Rice paper has some cool features, too. It absorbs color all the way through, so you can work on both sides of it. For example, on rice paper, you can print on one side with bright colors and then paint the back of the paper with a darker color to pop the colors off the front without mixing them. Also, when you tear it, the edges will take on the color you painted the back instead of being white.
Clean Up
If you leave some leftover paint on your Gelli plate, the residue will pull up on subsequent prints making gorgeous and unexpected pops of color and grungy effects. I don’t clean my plate much because I love that effect; however, occasionally, I will take packing tape and lay it across my plate. When you pull it up, it’s as clean as new.
Leaf Print Process
With the basics behind us, let’s get to creating the leaf prints!
Step 1 : Make a light colored solid print
 Brayer some light colored paint(s) onto the Gelli plate for the first pull. It does not require a lot of paint to make a successful Gelli print. If your brayer slips when you’re rolling the paint out, you have too much paint. On the other hand, if your brayer picks up paint as you roll it out, you don’t have enough. You’ll get the feel for it as you play.
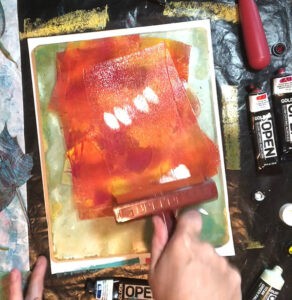
Step 2 : Create a mask with the leaves
 Paint a second, slightly darker color on the plate. Create a composition on the Gelli plate with your leaves. When you place your leaves on the plate, put the vein side down into the paint. Smooth the paper over the leaves. Make sure you rub around them well to get a clear outline of all the details. Pull the second print.
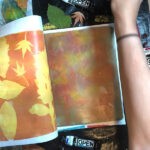
Step 3 : Make the Ghost Print
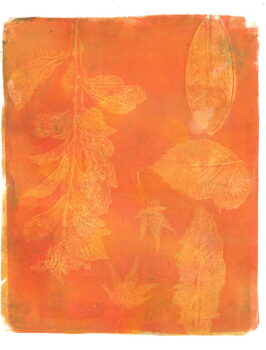 Carefully remove the leaves and set them aside. Take the same paper with the leaf outlines and place it back on the plate in the same place. One way to make sure your paper aligns well is to keep a sheet of paper under the Gelli plate as you work. Then you can always line up the corners for precise placement. Rub the paper well and pull. This third pull will add the leaf veins and details back into the center of the leaf outlines. When you pull multiple times from a Gelli plate without reapplying paint, it is called a ghost print. It’s lighter than the first one.
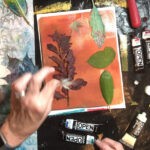
Experiment
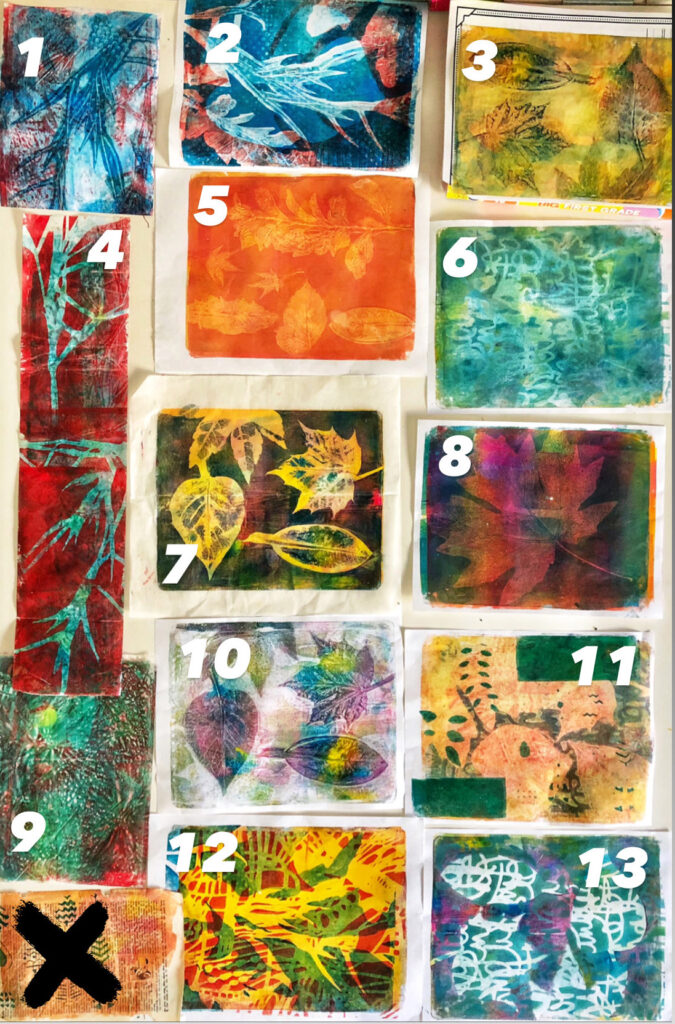
At this point, you might love your Gelli print and set it aside to dry. Or, maybe you don’t love it. My rule is, if I love it, I’m done. If I don’t love it, I add more layers until I do love it.
Here are my completed prints from this experiment. Please comment on which one you like the most and which one you like the least. Next week, I’ll attempt to make completed projects with both the winner and the loser. I’ll show you how to “save” ugly prints and some different ways you can use Gelli prints in final projects.


6 Comments. Leave new
I love Gelli plant printing. I also love doing this with my grandson. He is six and loves throwing paint around. I find that this technique is suited to his artistic style. This is a beautiful and well described post with great photos. Thanks. We will give the leaves a try.
It’s great to do with kids. I have a 6 year old and she loves Gelli printing, but so does my 14 year old, and so do I — it’s fun for all ages. Have fun!
Ooh, these are beautiful! I think I’ve seen things like this but never knew what they were called or how to do them! I’ll add it to my list of Things I Want To Do (but probably never will, ha). Fortunately, there are talented people like you to create beautiful things for the rest of us to enjoy!
Bettye
https://fashionschlub.com
Aw. Thanks. You should give it a try sometime! There are tutorials on how to make your own Gelli plate on YouTube if you want to try it out before buying one.
Gelli printing is so much fun to do with kids and adults. We always had a blast in the artroom with gelli printing. This is a great step by step procedure that is easy for people to follow if they have never done it before.
I love #8 the best, then 3, 7, 9 and 4. I really like them all but the colors and dark background is what attracts me to #8.