

This week is Administrative Professional Week. My husband asked if I could whip up a card to give to his wonderful administrative assistant. I rarely turn down a creative project prompt — especially if I can honorably get out of after dinner duties to craft — so I accepted the challenge gleefully.
Step 1: Choose Paper
To make this card, you’ll need 3 pieces of card stock. One for the base, one for the rectangle, and one for the baroque cut-out portion. Tip: using coordinating paper packs removes decision fatigue.
My ‘client’ gave me very little information when I asked about the recipient’s likes/dislikes. What I learned included, “she likes flowers.” Combing through my dusty scrapbook paper stash, I found the perfect flowery coordinating paper pack: sei’s Bright Blossom. (I made a pact with myself that I would not buy anymore paper until I use up my ridiculous stash, so this particular set is no longer available for purchase.) Use what you have; however, if you need me to enable you to buy something today, I’d love to vicariously purchase this cute Free Spirit set from Amazon.
Step 2: Cut Shapes
Next, I headed to my paper trimmer and Sizzix Bigkick machine. Of all the tools I’ve bought in the past 18 years of crafting, these are the ones I repeatedly use the most. They are a non-negotiable part of my crafting and art supplies. If you don’t have either, I highly recommend them. Also, especially for card makers, the scoring attachment adds a beautiful polish to your cards. You can buy it separately for very little money and it truly lasts forever.
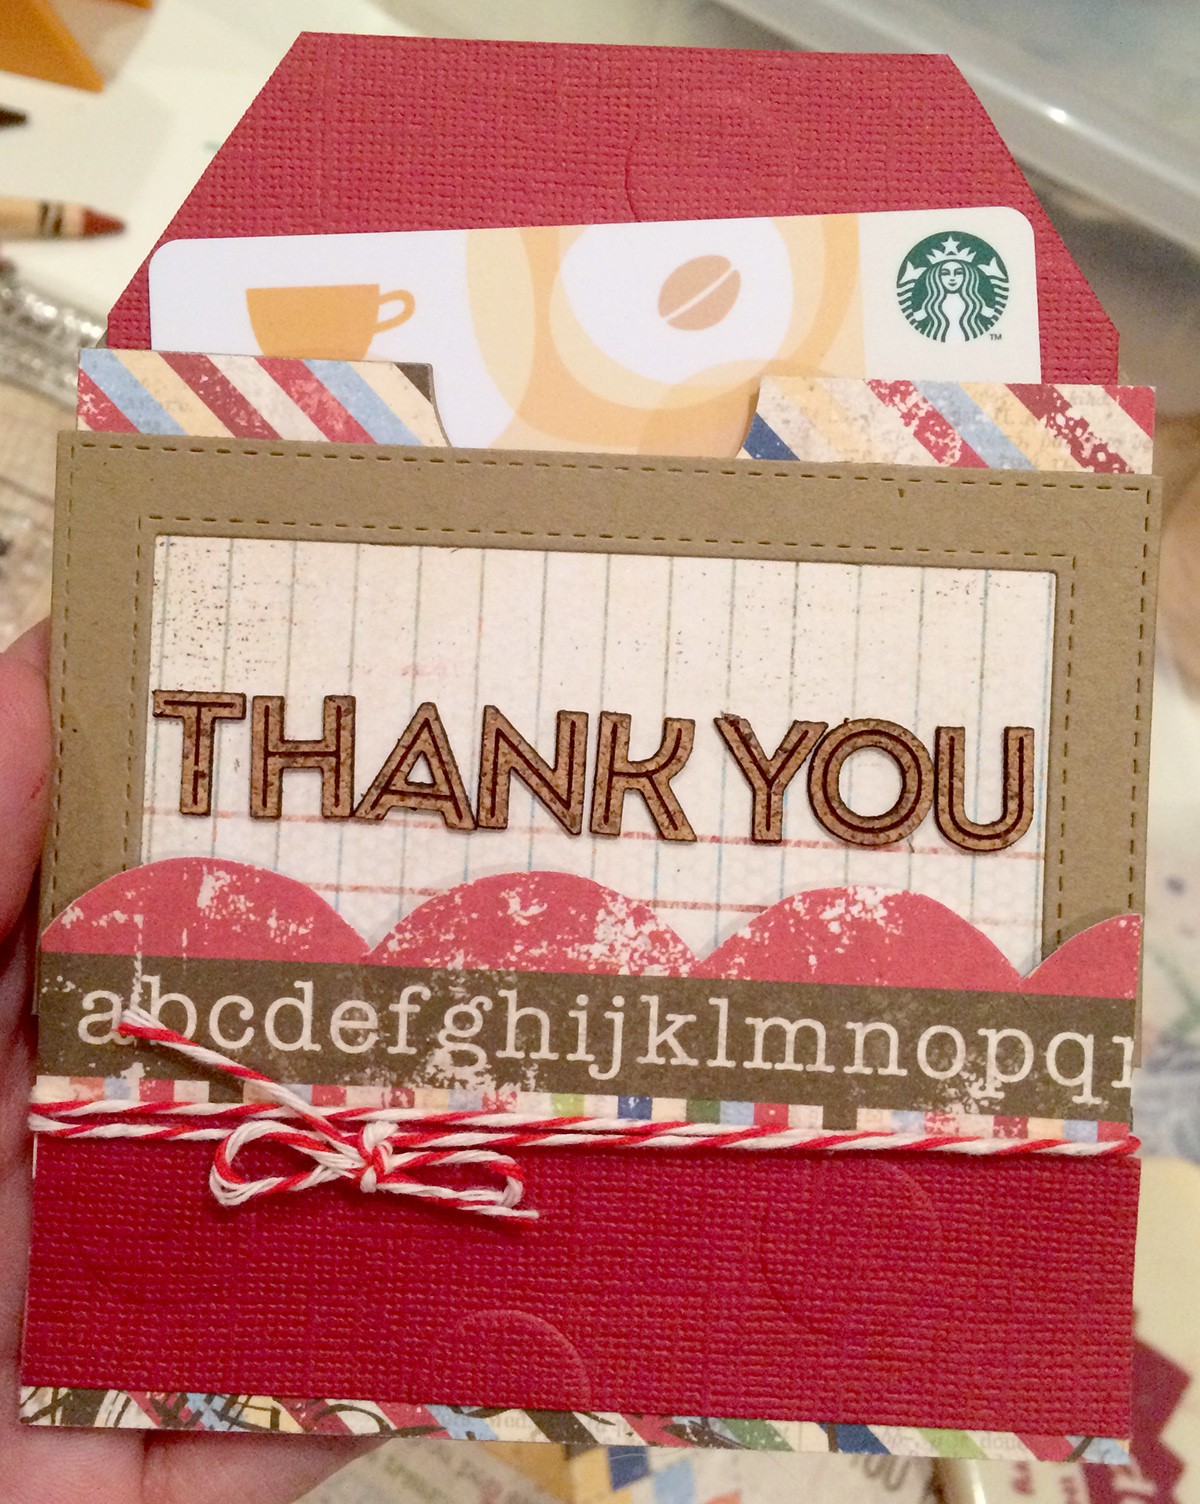
Initially, I used a technique I learned from Jennifer McGuire (all hail the Card Queen!), where I cut both the front and back of the card into the largest baroque shape. The stackable set by Tim Holtz works great and costs less than the old school version I own. (You’re welcome.) The final card is quite small, though. That’s when my client / dear husband (DH) added some vital information to his request, “I want to let 6-7 people in the office sign it. And I want to write a message in it.”
Cut Sizes
To enlarge the card, I pulled out a 6.5 x 5 inch white card from a value pack I purchased at Michael’s (similar to this set). Of course, you can easily cut your own card from a piece of white card stock instead of buying pre-cut, pre-scored cards. I cut the butterfly paper to 6 x 4.5 and centered it on the card front leaving a .25 inch white border.
Side note: I attach everything flat with my Scotch ATG 714 double sided tape gun. It adheres stronger than anything else I’ve ever tried and it works on paper, chipboard, and ribbon. I purchased the dispenser when I was hired to hand make wedding invitations almost 10 years ago. I have never had to replace it, although I’ve bought countless rolls of tape. (Consumer Tip: Michaels tape refills are half the length of Amazon’s and cost more.) Since then, it has become another art / craft staple supply for me. Every year, when I make my 120 New Year cards, I fall in love with it all over again.
Step 3: Embellish
To finish this card off, you’ll need some ribbon. I used a bit of lace I had lying around. Additionally, I used a few flowers from a pack I’d bought at the craft store. Lastly, I die cut the smaller label shape out of chipboard, painted it red, and added some Tim Holtz Big Ideas stickers with the ‘Thank You’ sentiment. You could easily print any sentiment you want out on your regular home printer, cut them out, and glue them on the label. You could also cut the label out on regular cardstock. I chose chipboard to add dimension to the card front. I use Glossy Accents to adhere 3D embellishments. After it dries, it’s super permanent and it will hold anything down: metal, fabric, plastic, etc…
This card template can be used for any occasion. It’s super quick to throw together and is bound to make the recipient feel special. Try it out!


6 Comments. Leave new
I love making my own cards…only bettered by receiving a personally made card.
This is really lovely. I bet she was happy to receive it! Thanks for sharing your steps.
What a fabulous tutorial! Thank you for sharing. <3
What a beautiful card made with such care. Thank you for sharing this. I’ve bookmarked your page and blog and will return!
I made all my own christmas cards for a few years, its very time consuming but a lot of fun, and very satisfying after I am done. Its something I think I might get back into again actually.
It IS time consuming, but I’ve had several opportunities arise from the practice. It’s like a self marketing piece. Also, when I go to people’s houses in the summer and our holiday card is still on the fridge, I get a little gooey inside.